Merch Jar Amazon Advertising Software
AMS Advertising Management App – Merch Jar
Monitor, make changes, and even automate your AMS optimization actions for your Amazon Advertising Campaigns with Merch Jar software.
MerchJar App – Amazon Automation Software
Things you should know before starting:
- There is a learning curve to just get connected
- There is a learning curve to actually using it
- It is in BETA so expect issues and beginner level ad management (at the moment)
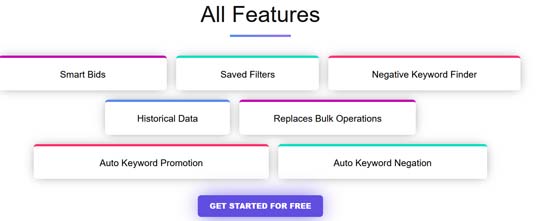
Merch Jar Advertising Software Features
- Paid Plans: Begin at a low monthly fee and increase based on your monthly ad spend. Each month, you receive $2000 of ads credits and that resets at the beginning of each billing cycle. (So essentially, if you spend under $2000 in ads, then you pay the lowest monthly price) You can see your balance daily.
- Ad Credit Packs at Discount: You can buy credit packs in bulk to save even more, and they never expire. They begin at 10K increments.
- Multi-Platform: You can connect anything (KDP, AA, Merch, FBA) if your Mgr Act connections are done correctly. You can turn these platforms on/off which might help control what monthly plan you are on
- International Amazon Advertising: Connect EU, AU etc.
- Dashboards: You can easily flip through all your platform dashboards for a quick daily review
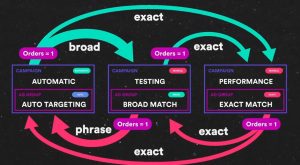
- Promotions (Automation-Rules): Currently include Bid changes and migrating Search Terms into new ads (like migrating from Auto to a Manual Broad-Match Campaign)
- Negative Keywords: There is a Negative KW option built into the promotion path, where you could set the promoted word as a negative in the campaign that you promote/migrate from (if KW isolation is desired).
- Support: There is a private Facebook group for USERS and there are 2 public Facebook groups for general Amazon ad tutorials
Here’s an pretty good video showing many of the features:
Sign up: Join Merch Jar – Click Here
PLEASE GIVE BACK:
If you found this post helpful, please also sign up for your FREE Airtable account (which gives me a credit on mine). It’s such an easy way to give back and support this blog. Plus, I show you uses for AirTable inside other articles! Sign Up for AirTable for FREE – Click Here
Merch Jar Promotion Sample Tutorial
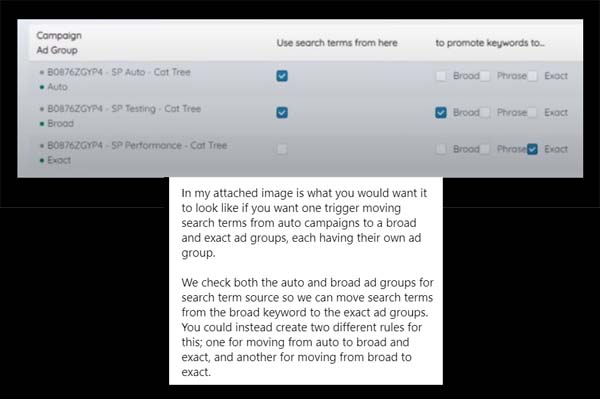
Below is a screenshot from one of the MerchJar Public Facebook groups, where he explains further how a SIMPLE promotion campaign settings should be ticked.

Getting Started Using Merch Jar Advertising Software
*Last Updated: 6/10/2021
Here are some notes to help you get started fast. (More coming, so be sure to check back)
- Connect: Connect all your platforms, even if you’re not yet advertising on them. Merch Jar begins collection data as soon as you’re connected and have a Campaign running, so you want this data to be building. Also, it’s so much easier to connect all right now, while the set-up is still fresh in your mind.
- Prepare: Begin adding campaigns for your ASINs. You will want them ready when you wish to set up rules. (For example, if you only have Auto Advertising Campaigns set up, create your Manual Broad or Manual Phrase match campaigns now and pause them. Later, you can easily “tick” them when you begin to create your promotions to move your performing Search Terms words from Auto to Manual.)
- Merch By Amazon: Begin with sold items. (Focus on items that will not be removed). You can fine tune even further by beginning with sold items that have X reviews.
- Dashboards: Review daily. Check ad spend and CTRs
- Logs: Review daily for anything that pops out as needing corrections (like perhaps you set up a Rule improperly or it’s just not doing what you expected).
- Smart Bids: Consider turning this on for all ASINs. (Use with caution – see next note.) If you’re just starting out, you can set your ACOS low (under Account Settings) and this will help keep you from waking up to an unexpectedly high ad-spend. Remember that you must have at least 2 sales for Smart Bid to trigger, so by turning it on, you’re all set for MJ (MerchJar) to begin working, and you don’t have to remember to come back in and turn it on.
- If you’ve been running ads, use this idea with caution. Smart Bid actions go both ways. When triggered, it will either raise or LOWER your bid. So if you think, “Sure, I’m going to turn SmartBids on and just set my account ACOS to 10%” and you’ve a profitable campaign running at 24% ACOS, that campaign will be impacted by your 10% Account Setting. Smart Bids will begin lowering your bid in the 24% ACOS campaign – UNLESS you go in and manually set the ACOS for that campaign to be set at 24%. Any MANUALLY SET ACOS percentages are ignored by the Smart Bid coding.
- Performing Ads and Promotions: If you already have performing ads (ads that are getting sales) begin with those ASINs because they already have sales and that data is needed to trigger the rules you set up. (We’re using the 80/20 rule, to focus on what’s already working, focus on what Amazon is already showing to customers and thus, has velocity.) Begin with sold in last 30 days and work your way backwards to sold this year, sold last yr etc. Check daily/weekly for new sales – optimize, consider additional ads and new promotions.
- Selling ASINS: Do you have ASINs selling that you don’t have ads running? Start setting up Campaigns for these. (This is the 80/20 rule again. Focus your efforts on what is selling.) Begin with ASINs that have reviews and then, move on to ASINs that sell but have zero reviews.
- ASINs with 0 Sales: Last step is to begin running ads on existing ASINs with 0 sales.
- New ASINs – Product Launch: Have a “Launch Strategy” for new items, meaning ASINs that are not yet on Amazon. Consider launching new ASINs with ads running immediately. This will slow down your uploading, so you have to decide if this approach is worth the ROI, especially when your product is currently “unproven” to generate sales. (Also, there is a lot of debate on which ads types to run at launch. You will need to visit PPC or AMS Facebook groups and blogs to decide which type of launch ads are the best fit for your product type.)
- Daily Tasks:
- Check for products that sold for the first time. Check if you have ads running; start if needed. Other sold items – optimize (which usually means cutting something) or enhance (which usually means more ads, KWs, ASIN targets, raise bids, etc.)
- Monthly Tasks:
- Auto Coding Check: If you run Auto Ads with separate targeting, you can double-check your coding. Go to Targets > Enter the coding you use for your Auto (like: Auto Close). Now, only Auto campaigns show that you intend to run as Close Match. Skim or use Cntrl+F to find any match types that don’t belong. For example: If you’re displaying Auto Close, then you shouldn’t see Auto Loose match type. If you do, that would needed to be edited.
- Select All in Bulk and Activate Manual Smart Bid: Go to Campaigns > Filter… Targeting = Manual… Apply (add a date filter as well if you like) > Select All > Click the ARROW next to 15 and choose all your rows (so you don’t just change 15 items) > Bulk Actions > Smart Bid > Submit (Turn it ON). As a side note, some users have found that Smart Bids with Auto might become too expensive, since the entire bid is raised and Amazon is going so wide in their customer targeting.
Merch Jar New User Cheat Notes
- Ads > Campaigns > ACOS: Green=good, Yellow=outside, Red=Way Outside your Target ACOS.
- Target ACOS (TACOS): Grey Font=Account TACOS, Black Font=Manually Adjusted TACOS.
- ACCOUNT Default: Set TACOS parameters for the entire account in Settings.
- CAMPAIGN: Manually assign a Campaign ACOS: Go to Ads > Campaigns and type in your desired TACOS. All Targets (KW, ASINs, Match Types) inherit the Campaign Target ACOS.
- AD GROUP LEVEL: Set ACOS for Ad Group target ACOS from Ad Groups
- TARGET LEVEL (Match type, KW, ASINs): Set ACOS for your Targets and Keywords pages
- Smart Bids: Set Smart Bid parameters under Account Settings. Turn them on under Ads > Campaigns and tick the Smart Bid button. Smart Bids will both raise or lower your bid daily to reach your Target ACOS by bringing your actual Cost Per Click to your Target Cost Per Click (CPC). Click Dry-Run button for a preview. Check Logs (main menu) for the history.
- Bid Adjustments:
- Ads > Keywords (to adjust bids for KWs from Manual) or
- Ads > Targets (to adjust bids for Auto match types and Manual Product targets)
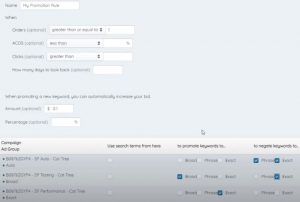
- Basic Promo Rule: The settings for the MJ video example of promotions are:
- When a KW has 1 order, add the Search Term to both Manual Broad and Manual Exact.
- Add the term as a negative phrase and negative exact match to the Auto campaign.
- Add the term as a negative exact match to your Broad campaign
This is just an example of how you might start off. You may agree or disagree with the steps, and you can modify as needed.


Stay in touch with me for the latest tips and honest reviews – Sign up for the newsletter:
.


